Showing posts with label food. Show all posts

Sunday, July 22, 2012

Instagram Me: 7.7.-7.21


AMAZING LOUIS VUITTON X YAYOI KUSAMA WINDOW DISPLAY

LOADS OF INSPIRATION


TOO BUSY PLAYING GAMES

COOL NEW PRINTS - SHIRT-SHEINSIDE / MAKEUP POUCH-DAFFY'S

YUMMY PANERA LUNCH
MY HAIR IS SLOWLY BUT SURELY GETTING TO THE IDEAL LENGTH

MY GO TO WALLET & SUNNIES - TARGET / KAREN WALKER

AWESOME CUFF THAT JOSHUA GOT ME FROM BEACON'S CLOSET

OH YEA, FREE SLURPEE DAY!

NEW ESSIE MIRROR METALLIC NAIL POLISH IN PENNY TALK


NEW PROJECT IN THE WORKS - LINDSEY WIXSON

Since I've been MIA (aka summer class and work are taking over my life) I figured I'd update you with what I've been up to in the past 2 weeks. Follow me @olivejoe to continue stalking my life :)

Friday, June 22, 2012

Food For You: Quinoa Pizza Bites


Since it was a million degrees here in New York yesterday, I decided to stay in the nice air conditioning and make some tasty bites to snack on. These quinoa pizza bites are super easy to make and quite delicious. They're perfect for entertaining or as a snack for kids. Plus, they're relatively healthy (compared to regular frozen pizza bites) at 175 calories per serving (5 bites).

You'll need:

-2 cups of cooked quinoa
-2 eggs
-1 cup chopped onion
-1 cup shredded mozzarella
-2 cloves of minced garlic
-1/2 cup fresh, chopped basil
-1 cup chopped pepperoni (or leave it out if you're vegetarian!)
-1/2 tsp seasoning salt (I substituted with salt, pepper and powdered garlic)
-1 tsp paprika
-1 tsp dried, crushed oregano
-Your choice of sauce (i.e. marinara, tomato and basil sauce...)

First, cook your quinoa by package directions. About 1 cup of dried quinoa makes 2 cups cooked. Preheat oven to 350ยบ
 
Next, prepare all other ingredients in a bowl. A food processor makes your life much easier when chopping the onion, garlic, basil and pepperoni.

Mix all of your ingredients together (except dipping sauce) and plop tablespoon fulls of mixture into greased mini muffin tins.

Bake these little babies for 15-20 minutes in the preheated oven. When done, let cool for a few minutes before taking them out. Serve with your sauce and tada! Time to chow down!


Told ya it was easy! Enjoy!

Recipe from here.

Photos: Myself

Wednesday, March 28, 2012

Food For You: Cherry Almond Cupcakes


As promised, here is the recipe for those adorable little cupcakes from my previous post. There's some work involved because everything is made from scratch, but I promise you, they are totally worth it!

What You Need:
Batter:
-1/2 cup (1 stick) unsalted butter
-4 egg whites
-2 cups all-purpose flour
-1 tsp baking powder
-1/2 tsp salt
-1/4 tsp baking soda
-3/4 cup buttermilk
-1/3 cup maraschino cherry juice
-1 1/2 cups sugar
-1 tsp vanilla
-1/2 tsp almond extract
-12 maraschino cherries, halved

Frosting:

-1/2 cup butter
-4 cups powdered sugar
-3 Tbls maraschino cherry juice
-1/2 tsp almond extract
-optional: extra cherry juice or milk

and of course, any cute decorations you want to add :)

Batter:

First you want to let the butter and eggs stand at room temperature for at least 30 mins. This allows the ingredients to be absorbed better into the mix. Then, pre-heat your oven to 350°F. Next, stir together your dry ingredients and then in a separate bowl mix together the buttermilk and cherry juice.
Beat the butter until fluffy and then slowly add the sugar, vanilla and almond extract. Next, add your egg whites one at a time, beating well after each egg. Alternately add the dry mixture and the buttermilk mixture to the wet ingredients (with egg). Again, make sure you beat well after to each addition to make sure everything is distributed evenly into the batter.
Then, spoon the batter into cupcake tins lined with paper liners. Smooth out the top of the batters and then insert half a cherry right into the top of the cupcake. Pop those babies into the oven for about 15 to 18 mins. *Insert a toothpick into the cupcake and when you take it out you should see moist crumbs. Let these cool completely on wire racks.

Frosting:
Beat butter until fluffy and then gradually add one cup of sugar, beating well. Next beat in the cherry juice and the almond extract. Then, slowly beat in the other 3 cups of powdered sugar. If your frosting seems too think or dry, add some milk or additional cherry juice. Once it is at your desired consistency, you can add some food coloring to make it extra pink :)
Use a knife or piping bag to frost your cupcakes (I used a zip lock bag with the tip cut off, not the neatest option, but it gets the job done). And now for the fun part(besides eating them of course): decorating! I bought these adorable little pearl sprinkles and polka dot liners and boxes from Michaels Arts and Crafts store and it went perfectly with the color and flavor of the cupcake. And last, I topped with a whole cherry of course!

ENJOY!

Photos: Adorn Me
Recipe: Better Homes & Gardens 2011 Cupcakes Issue

Monday, March 26, 2012

Tea Time


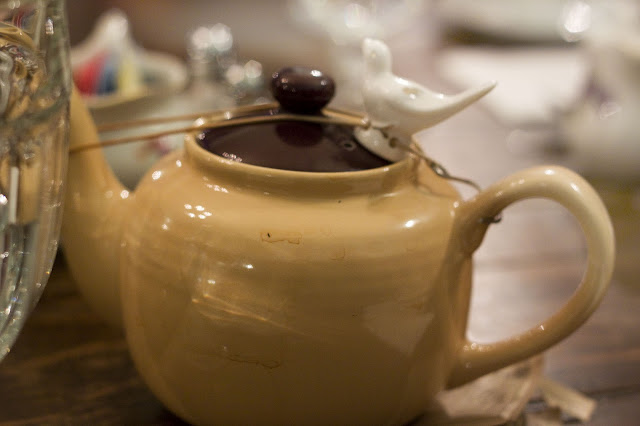
Last Sunday I went to this lovely little tea shop for my friend Mariah's birthday. It is called Alice's Tea Shop and it is the perfect place to get together and have delicious teas and yummy scones. If you're ever in NYC, definitely check it out, it's super cute! I also made those adorable little cherry almond cupcakes especially for Mariah. I'll share the recipe with you soon!

Photos: Adorn Me

Wednesday, February 15, 2012

Details: V-Day

CARAMEL WALNUT BROWNIES (RECIPE COMING SOON!)


FOREVER 21 ROPE NECKLACE

LIPSTICK- MATISSE ELITE IN PROVOCATIVE 

BRACELETS- MICHAEL KORS  / MARC JACOBS LOLA PERFUME


 I had a lovely Valentine's Day yesterday with my love, and for some reason we exchanged gifts the night before because we're just so impatient when it comes to presents (and no, it wasn't my idea!). Josh got my this lovely Michael Kors bracelet to match the ring he got for our anniversary a couple weeks ago :) So happy, it reminds me of the Cartier Love bracelet, except about a...twentieth of the price, haha. He also got me these yummy chocolate covered cherry Jelly Bellies, delicious! Even though the day was spent mostly at school, we enjoyed a nice sushi dinner and just relaxed, that's all I could really ask for.

Photos: Adorn Me

P.S. The little hearts were made with a simple filter that I made for my lens! Find the tutorial here.

Saturday, February 11, 2012

Vintage Valentine Card Cookies

How freakin' cute are these Valentine's Day cookie pops from Bakerella? I've been searching for fun Valentine's Day treats to make for my love, and came across them. The vintage Valentine's Day cards were printed with edible ink on sheets of icing. I don't think I would ever want to eat these! Since Valentine's Day is around the corner and I'm assuming edible ink isn't cheap, I don't think this is an option for me, but, if you're determined enough, check out the directions here. If you have any Valentine's Day recipes I should check out let me know!

Photos via Bakerella

Friday, January 13, 2012

New Year, New Design

FASHION • FOOD • PHOTOGRAPHY
Here's to the new year! Sorry, a little late on that one. But, to celebrate a new year, and almost a year blogging (31st!), I decided to start fresh with a brand new design and content. What do you think? So fresh and so clean clean...sorry, I had to.

Photos: myself

Wednesday, January 11, 2012

Food For You: Pear Prosciutto Havarti Cheese Pizza


Another food post already! But seriously, when I saw this pizza on tablespoon.com, it was exactly what I was craving and it needed to be in my tummy by dinner. I just so happened to be going grocery shopping and picked up the ingredients. As you can probably tell already, I LOVE fruit and cheese...sweet, salty YUMMM. And again, it's super simple to make. I made a few minor changes from the original recipe, here.


Ingredients:

- Cookie sheet
- Your choice of pizza crust (I wanted it to be quick so I bought a tube, but if your ambitious, make your own!)
- 1 package of Havarti Cheese
- 1 package of Prosciutto
- 1 medium red pear
- 1 medium green pear (Don't worry if the pears aren't completely ripe because their going to cook in the oven)
- Mixed greens or arugula, which is what the original recipe calls for
- Butter flavored cooking spray, olive oil, pepper and optional vinaigrette (not pictured)

OK so, first, preheat your oven to 425 degrees. Then, Lightly spray your sheet with butter flavored cooking spray and roll your pizza dough evenly on to the sheet.


Now, place your sliced Havarti cheese on the dough, leaving a little room on the outside for a crust.


Next, spread the prosciutto on top of the cheese.


Slice your pears thinly and spread evenly around the pizza. In my case, I only did half
because my boyfriend despises cooked fruit, weirdo.


This is my own step, since I didn't want to use arugula, I compensated with some black pepper
because it tends to have a peppery taste to it.

Drizzle olive oil on the edges to create a golden crust.


Pop it in the oven for about 15-17 minutes or until the crust is golden brown.


Once you see that the crust is a nice golden color you can take it out. Then let it cool before you cut it.


Lastly, cut a rectangle slice, top it with your greens and an optional drizzle of raspberry vinaigrette
and CHOW DOWN! A delicious, somewhat healthy, pizza. Play with the ingredients
and try other kinds of fruit and cheese and let me know what you think!


All Photos by Myself